Show us your servo powered lifter arms!
Moderators: BeligerAnt, petec, administrator
Show us your servo powered lifter arms!
Looking for inspiration so lets be having your pictures here! I need up close nitty gritty shots of how your arms are made and attached to the servo 
-
peterwaller

- Posts: 3213
- Joined: Fri Feb 15, 2002 12:00 am
- Location: Aylesbury Bucks
- Contact:
Re: Show us your servo powered lifter arms!
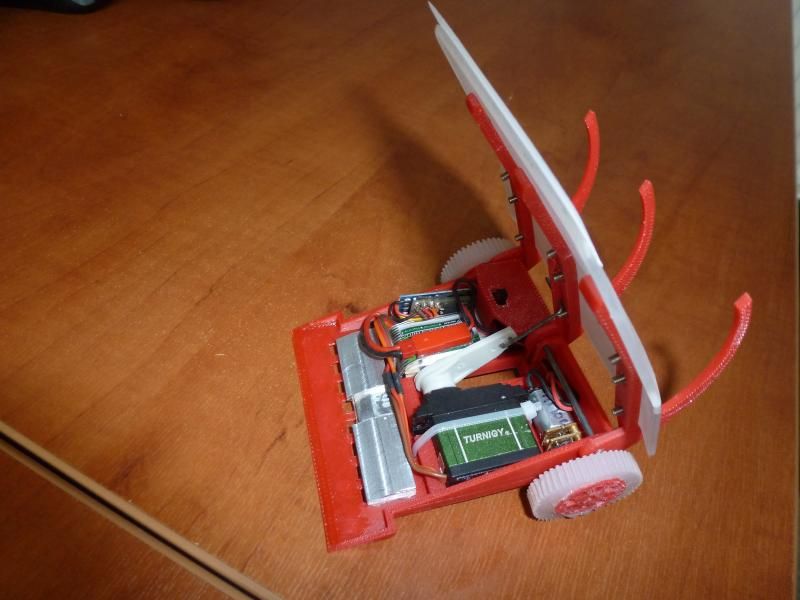
In flippant the lifter is mounted on three arms which in turn are mounted on the 2mm piano wire that goes across the rear of the robot just behind the gearmotor.
The servo arm is then linked to the middle arm via a 1mm pianowire link.
The picture shows the servo in the up position and it turns clockwise as you look at it to lower the lifter.
The arm goes into the hole that is visible in the chassis floor.
Re: Show us your servo powered lifter arms!
Wo that's so neat and a dead good idea! Is it 3D printed? I'm also guessing that because the rod seperates the load and the servo any shock won't wreck the servo? Thanks for the pic.
-
Remote-Controlled Dave
- Posts: 3716
- Joined: Sun Apr 03, 2005 5:30 pm
- Location: Antrim, Northern Ireland
- Contact:
Re: Show us your servo powered lifter arms!
Direct attachment worked pretty well for me at the last one! Mine couldn't have been more simple, literally a load of components strapped to a bit of HDPE and I managed to get it into the top 16.
Not the greatest picture but if you have time to watch the video of the AWS you'll see its pretty simple.
Not the greatest picture but if you have time to watch the video of the AWS you'll see its pretty simple.
- Attachments
-
- Hippopotomonstro.jpg (340.47 KiB) Viewed 10016 times
Die Gracefully Robotics
Winner - AWS 39
Winner - AWS 39

Re: Show us your servo powered lifter arms!
Here's some of accelerants old flipper attachments:
I actually really wish I knew where that carbon fibre chassis is....
And because I had to delve way back I stumbled upon these: My first ants.
Sorry for tiny image.

I actually really wish I knew where that carbon fibre chassis is....
And because I had to delve way back I stumbled upon these: My first ants.
Sorry for tiny image.
Nuts And Bots - For all your components and ready built antweights!
Alex Shakespeare - Team Shakey / Nuts And Bots / Team Nuts:
AWS 44, 45, 49, 51 & 55 Winner - Far too many robots!
Alex Shakespeare - Team Shakey / Nuts And Bots / Team Nuts:
AWS 44, 45, 49, 51 & 55 Winner - Far too many robots!
-
Remote-Controlled Dave
- Posts: 3716
- Joined: Sun Apr 03, 2005 5:30 pm
- Location: Antrim, Northern Ireland
- Contact:
Re: Show us your servo powered lifter arms!
Love the originals, Shakey
Die Gracefully Robotics
Winner - AWS 39
Winner - AWS 39
Re: Show us your servo powered lifter arms!
Two servos for twice the coolness. But yeah directly mounted to the servo is the way I prefer.
For my stuff:
http://bodgeitandhope.blogspot.co.uk/
http://bodgeitandhope.blogspot.co.uk/
Re: Show us your servo powered lifter arms!
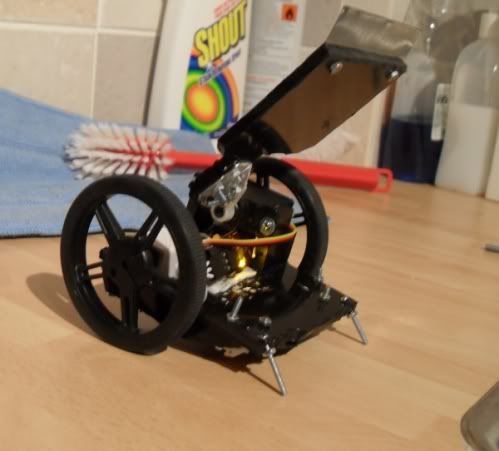
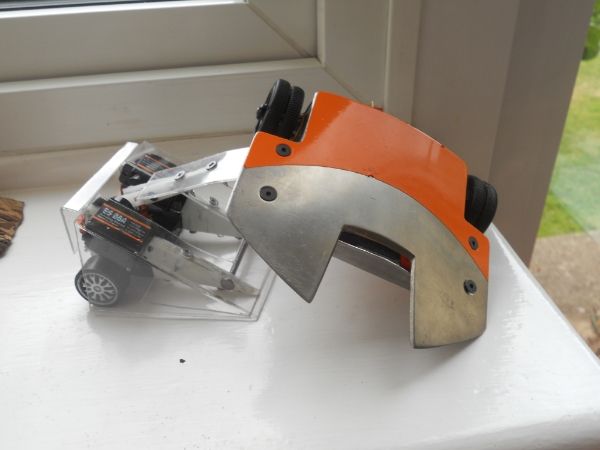
Here's Void's. I far prefer having the flipper hinged on the chassis as this will give you a stronger connection, even if you're using a metal geared servo and metal servo horns. That said, it is more complicated and as long as you design the robot well, the risk is minimal.
Having a mechanism such as this offers other advantages, such as being able to change the speed/power/travel of your flipper by changing the lengths of the relevant arms. In Void, I have the link from the servo hinged quite far back on the flipper arm. I do this because the servo has more torque than I need, so I sacrifice some of that power for increased speed instead, which gives me bigger flips. I limit the travel of the servo to around 60 degrees so as not to flip too far and end up turning myself over.
Additionally, having the flipper hinged at a separate spot allows you to have the hinge higher up on your robot than it would be if it was directly connected to the servo. Having the hinge of your flipper higher gives some advantages, such as that the front of your flipper is moving away from the body of the robot (thus stopping people from falling off it) for more of it's travel, and making it easier to self-right.
Scott Fyfe-Jamieson, Captain of Epic Robotics. Champion of AWS38/41/42.
http://www.epicrobotics.co.uk
http://www.epicrobotics.co.uk
Re: Show us your servo powered lifter arms!
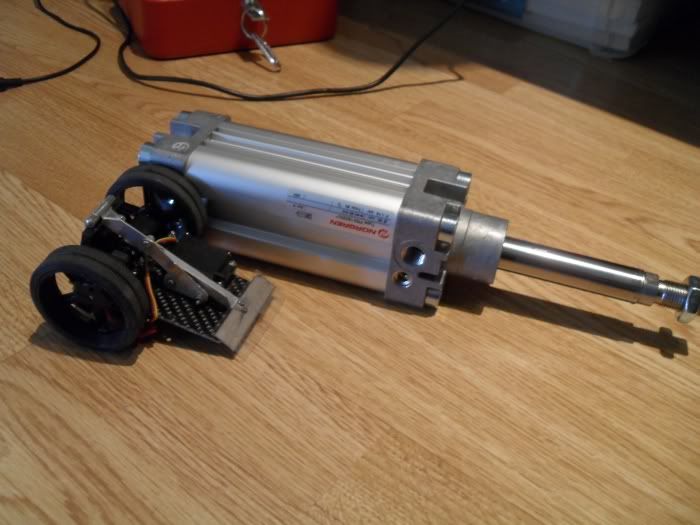
I went for a proper four bar linkage with Lionel, but my servo wasn't really powerful enough for it to be worth while. These days all my flippers/ lifters just use basic 3 bar techniques.
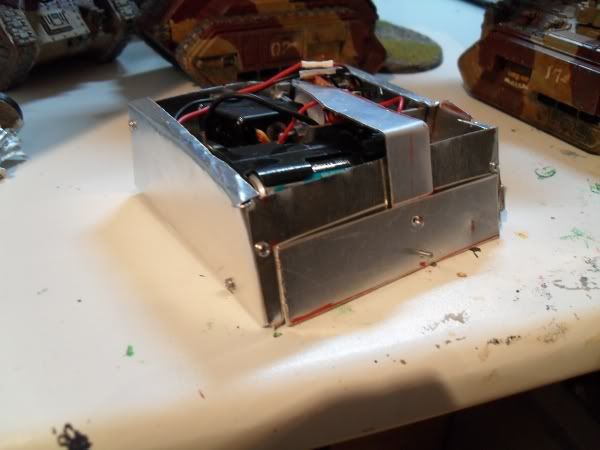
The linkage on chocolate bot is just a 'weapons grade' (large) paper clip bent into the holes on the servo arm that just slides along the bottom of the flipper. It's just hinged at the back with cable ties and closes because of gravity/ the tention of the cable ties. The servo's just attached with hot melt glue (which is a great improvement over the original blutac!)

Bully Dozer uses the same principle, but with two servo arms (badly) screwed together, and then an elastic band to pull it shut again...

It's pretty much the same linkage as used in Will's kits...as I may have borrowed the idea...
Three bar linkages work pretty well with low power servos, as the flipper will open to about 45 degrees when the servo arm moves 90 degrees, giving some extra leverage. I use really cheap servos, so they work best for my bots... plus they're really simple and i'm lazy
The linkage on chocolate bot is just a 'weapons grade' (large) paper clip bent into the holes on the servo arm that just slides along the bottom of the flipper. It's just hinged at the back with cable ties and closes because of gravity/ the tention of the cable ties. The servo's just attached with hot melt glue (which is a great improvement over the original blutac!)
Bully Dozer uses the same principle, but with two servo arms (badly) screwed together, and then an elastic band to pull it shut again...
It's pretty much the same linkage as used in Will's kits...as I may have borrowed the idea...
Three bar linkages work pretty well with low power servos, as the flipper will open to about 45 degrees when the servo arm moves 90 degrees, giving some extra leverage. I use really cheap servos, so they work best for my bots... plus they're really simple and i'm lazy
Last edited by Rapidrory on Fri Aug 15, 2014 5:41 pm, edited 1 time in total.
Rory Mangles - Team Nuts
Robots: Nuts 2 and many more...
NanoTwo Motor Controllers: https://nutsandbots.co.uk/product/nanotwodualesc
Robots: Nuts 2 and many more...
NanoTwo Motor Controllers: https://nutsandbots.co.uk/product/nanotwodualesc
-
BeligerAnt

- Posts: 1872
- Joined: Wed May 15, 2002 12:00 am
- Location: Brighton
- Contact:
Re: Show us your servo powered lifter arms!
An article I wrote a long time ago about flipper linkages: http://garya.org.uk/antweight-robots/te ... r-linkages
And a simulator to take away some of the maths (possibly!): http://www.linkagesimulator.com
And a simulator to take away some of the maths (possibly!): http://www.linkagesimulator.com
Gary, Team BeligerAnt